As YOPS is just a set of Java classes, these classes can be added to any particular Java project. Our purpose here though is to support adding YOPS into projects for various IDEs. Although currently limited in scope we intend to add more as users let us know about IDEs which they are using with YOPS. If you require support for a specific IDE, please contact us and let us know.
Environments:
Eclipse
Eclipse Integration
If you do not have Eclipse, you can download it for free from eclipse.org.
First download YOPS from SourceForge in either the zipped source Java files or .jar archive file. Instructions for setting up the .jar archive follow after the zipped source instructions.
Zipped source files
- Create a new project in Eclipse (File > New > Project...) or if you have a project already, skip to instruction 4.
(Screen Shot)

- Choose a Java Project and click "Next >".
(Screen Shot)

- Name the project as you like (we have chosen YOPS_Project here).
YOPS requires you have JRE 1.5 or above. If your default JRE is 1.4 or less, and you cannot "Use a project specific JRE" of 1.5 or above, you will need to download a new Java JRE from java.com.
Once you have a Project name and JRE 1.5 or above, click "Finish".
(Screen Shot)

- If you see Welcome screen, close it by clicking the 'x' next to Welcome on the tab. You should be able to see the Package Explorer to the left of the Eclipse window now (if not, go to Window > Show View > Package Explorer).
(Screen Shot)

In the Package Explorer, right-click on your project and select "Import...". (Screen Shot)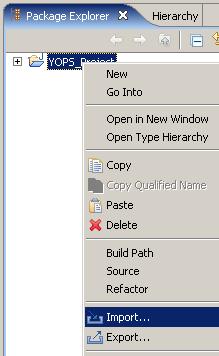
- Choose archive file and click "Next >".
(Screen Shot)

- Click the "Browse..." button and navigate to the directory you downloaded the yops_1.x.x.zip file to. Select it and press "Open".
(Screen Shot)
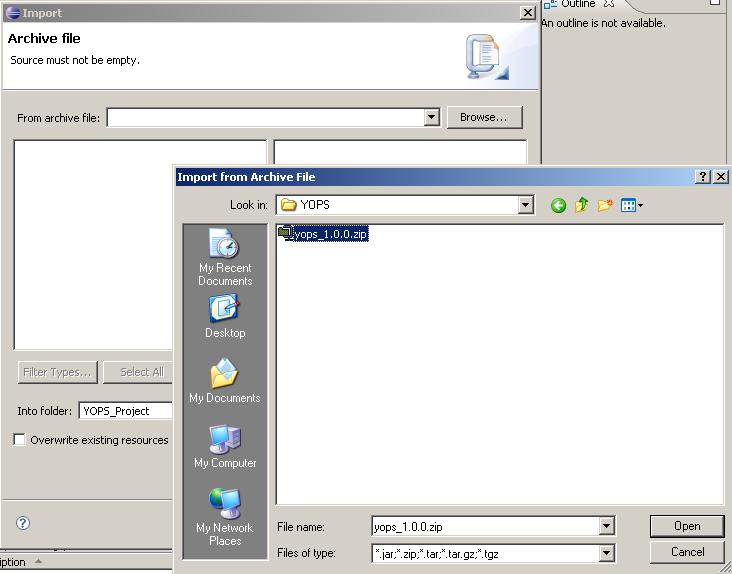
- The left pane should show a directory "/". Expand this directory by clicking the "+" to the left of "/" and you should see a directory named "yops". Be sure there is a checkmark in the box to the left of yops, and click the "Finish" button.
(Screen Shot)

- In the Project Explorer, if you expand your project, you should see a yops package in your project. Expanding the yops package will show the YOPS classes.
(Screen Shot)

- You can now access the YOPS classes in another Java class in this project by importing the yops package (import yops.*;). For more help with using YOPS, see the examples.
Jar file
- Create a new project in Eclipse (File > New > Project...) or if you have a project already, skip to instruction 4.
(Screen Shot)
- Choose a Java Project and click "Next >".
(Screen Shot)
- Name the project as you like (we have chosen YOPS_Project here).
YOPS requires you have JRE 1.5 or above. If your default JRE is 1.4 or less, and you cannot "Use a project specific JRE" of 1.5 or above, you will need to download a new Java JRE from java.com.
Once you have a Project name and JRE 1.5 or above, click "Finish".
(Screen Shot)
- If you see Welcome screen, close it by clicking the 'x' next to Welcome on the tab. You should be able to see the Package Explorer to the left of the Eclipse window now (if not, go to Window > Show View > Package Explorer).
(Screen Shot)
In the Package Explorer, right-click on your project and select Build Path > Add External Archives. (Screen Shot)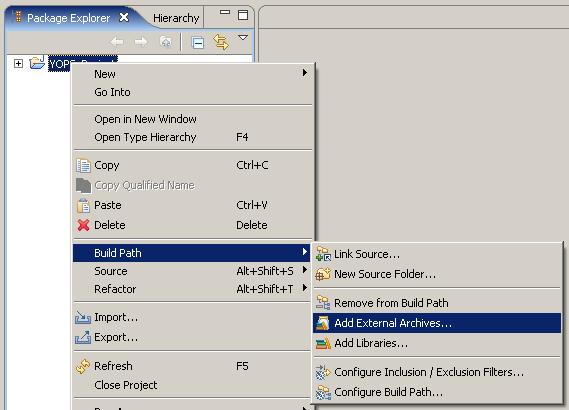
- Navigate to the directory you downloaded the yops_1.x.x.jar file to. Select it and press "Open".
(Screen Shot)
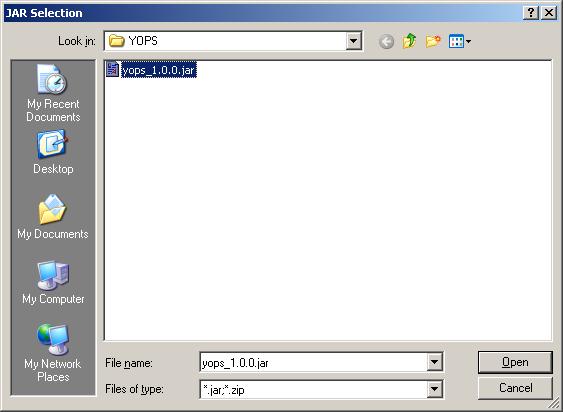
- In the Project Explorer, if you expand your project, you should see "yops_1.X.X.jar" listed under the project you added it to.
(Screen Shot)

- You can now access the YOPS classes in another Java class in this project by importing the yops package (import yops.*;). For more help with using YOPS, see the examples.